Showing posts with label sewing. Show all posts

Thursday, January 2, 2014

Christmas Crafts

I promise I'll post about my kitchen floor soon. It's been done for weeks, but then we had Thanksgiving and Christmas and I just haven't gotten around to putting together a post. On the plus side, I can post the update on how the floor is holding up at the same time!

In the meantime, here are the crafts I made for the kids for Christmas this year. Although I didn't hand make as many gifts as I would have liked, I do love the ones that I did make. And the kids love them as well.

Hats and Mittens

Each child received an adorable crocheted hat and matching mittens.


Zaylee got a panda bear.


Thomas got a red angry bird (I didn't add the feathers on top or the tail, and I changed the beak)


Audrey got a purple owl.


Phillip got a monkey. His mittens don't have thumbs - it's hard enough to wrestle his cute little hands into mittens without having to worry about getting his thumb into its own little section.


Backpacks

Zaylee and Thomas were both in need of new backpacks. When trying to buy them, I discovered that the selection of children's backpacks is extremely limited this time of year. I figured I might as well just make some. So I bought a pattern and some notions, and used fabric I already had on hand, and made backpacks. They weren't the easiest craft I've ever done, and there were times I wanted to just give up and buy something boring and utilitarian from the store. But in the end they turned out great and the kids like them a lot.

Zaylee and her red-and-white swirly backpack.


Thomas and his blue corduroy backpack.


All in all it was a fun Christmas, with everyone enjoying their gifts, homemade or otherwise. :)


Linking:
Think Tank Thursday at Joyful Homemaking
Wowza Weekend Link Party at My Love 2 Create 
Link Party Palooza at tatertots & jello
Strut Your Stuff Saturday Link Party at Six Sisters' Stuff 
Project Inspire{d} at An Extraordinary Day 

Tuesday, March 12, 2013

Iron Craft #5 - Green Binky Clip

This is so far my smallest Iron Craft creation, but I have a really good excuse. I've been dealing with some really painful gallbladder issues, and finally had to have my gallbladder taken out. Actually, I'm writing this post a few days before the surgery, but since my surgery is scheduled for the day before Reveal Day, I'm just writing this ahead of time, and that ornery little organ will be out and gone by the time this post is up.

Our challenge this round is Green - either the color green, or the environmentally-friendly "green." I've been meaning to make my little guy a binky clip for quite a while, so I made him a green one.


As a fourth time mom, I'm not really all that concerned about germs on the pacifier, a little dirt never hurt anyone. However, it was really frustrating when he would drop the binky because it would roll unpredictably all over the place and disappear. Those things are sneaky! I could never keep track of his many pacifiers because they were always getting lost. Not anymore!


I followed this tutorial from see kate sew to make this pacifier clip.

Linking to Tatertots and Jello Weekend Wrap-Up Party

Monday, January 28, 2013

Iron Craft - Orange

The second Iron Craft Challenge of 2013 is Orange. This could be something that is the color orange, or something made with oranges. Not my favorite color, but as was pointed out on the challenge post, this is supposed to be a challenge. So I embraced it and dug through my fabric stash to find something orange.

I have had my eye on these dress form mannequin pin cushions from The DIY Dish for quite some time. I love dress forms, and I love pin cushions. I think that combining the two is just an adorable stroke of genius.


The butterfly fabric is a fat quarter I got from Wal-Mart a while back. My fabric stash is fairly limited when it comes to orange, so I'm glad I was able to find something this cute. I do wish that I had cut it so that the big butterfly in the front would be right side up, something I'll keep in mind if I make any more of these (and I probably will because it's so easy, cute, and fun).

The candlestick came from the thrift store. While I was there, I picked up a variety of different stand possibilities. I ended up choosing this glass candlestick because I thought it matched the big bead at the top of the dress form.


But how cute will these be for other pincushions in the future!


The flower is a small strip of rolled felt, with a pretty button from my stash.


Now that I've made this adorable pincushion, I find myself suddenly obsessed with pincushions! I have a couple already, a plain tomato and a patchwork square. But now I want to make more and more, because I think little Miss Dress Form looks lonely. She needs some friends. Like these! Or these! And one of these would be fun too. :)


Linking to Tatertots and Jello Weekend Wrap Up Party

Friday, May 11, 2012

Scripture Covers

Our Primary presidency has been encouraging all the kids to bring their scriptures to Primary each week. I've kind of been a slacker, and my kids didn't even have any scriptures. But I went to the thrift store today and got Zaylee and Thomas each a hardcover Book of Mormon that they can bring to church.

And of course, I can't get them each a Book of Mormon without making each of them a scripture cover to go with it!


I used this tutorial from delia creates. It was very easy to follow and the cases both turned out really cute. I think I like Zaylee's a little bit more, just because the fabric is so colorful and fun. Anyway, the kids are really excited to have their own scriptures and to have such fun scripture covers to carry them around in.

Of course, coming from the thrift store, the books have been written in. The kids don't mind though, I don't think they even noticed.

Linking to tatertots & jello Weekend Wrap Up Party

Monday, March 26, 2012

I made a podeagi

I love babywearing, especially with homemade carriers. I have a mei tai, a wrap, a sling, and now I can add podeagi to the list. I'm really excited about this one, because not only is a podeagi super easy to use, but come August when the baby is born, it will be nice to have a carrier that is very light and not bulky. The blanket portion, which is not weight bearing, is made of two layers of quilting fabric. The straps are made from some old curtains we weren't using. Since the straps are the weight bearing portion of the carrier, they needed to be made of sturdy fabric. The curtain I cut up is fairly heavy and sturdy, and also has a really pretty sheen to it that makes the podeagi extra special.

To make the podeagi, I sort of used the tutorial for Melanie's Podeagi Baby Carrier, though I used my own measurements to tailor fit my body and what I wanted. I used two different fabrics for the blanket. That way the podeagi is reversible. The blanket is about 22" wide x 29" long. The straps are a total of about 150" long and 2.5" wide. There is a layer of fleece padding in the straps along the blanket and extending out for several inches, to cover the shoulders. Much more comfortable.


Here are some action shots. Audrey absolutely loves being worn in a baby carrier. She gets so excited as I'm strapping her on. This is fun, but has a flip side - she always throws a fit when it's time to take off the carrier and put her down!


Linked to Tatertots & Jello.

Tuesday, March 13, 2012

Diaper Bag

I'm expecting a baby in August, and need a new diaper bag. Previously, I have used the black vinyl bags that came free from the hospital. Not very cute, but they did the job. This time I decided I was going to make my own so I could have something a bit more stylish.

I used this tutorial from crafty couple. Just a couple notes - She states to cut the side panels 6" x 13", but the rest of the bag is only 11 1/2" high. So the panels should actually be cut 6" x 11 1/2" to match the rest of the bag. Also, instead of using interfacing to stiffen up the exterior fabric, I just saved myself a step by using heavy home decor fabric. It worked great. Here's some pictures of my finished diaper bag.

Front outside of bag

A pocket on each side for stuff like bottles, sippy cups or keys.

Two pockets on the outside under the front flap, for stuff like my Kindle and wallet.

Very roomy on the inside, with pockets for stuff like lotion, ointment, cell phone, whatever.

I left the bag pretty plain, but it is easy to accessorize with decorative pins,
which makes it easy to change the decorations whenever the mood strikes.
I'm pretty pleased with how this bag turned out. It's always exciting to create something new and have it turn out just the way you want.

Tuesday, November 1, 2011

Halloween Costumes

Along with the cute little crocheted ears I made for the kids, I also had to make matching costumes. I'm all about doing things simple and inexpensive. We had a prowling kitty cat, and swooping bat, and a fluttering butterfly, and I was able to crank out all three costumes in three days.


The Cat

For Zaylee's cat costume, I crocheted a long, fuzzy tail and sewed it onto the back of some brown sweatpants. Besides the ears, the tail is her favorite part of her costume, and mine too! It's a long tube of double crochet, in Lion Brand Homespun.


Next I crocheted a large oval. This I hot-glued onto a brown turtleneck to act as the fuzzy belly. Add the ears and some kitty makeup, and the cat costume was complete.


The Bat

For Thomas' bat costume, wings were an absolute necessity. I used the basic instructions given at Alphamom (which I found on Pinterest, and can thus link this post to the pin-did challenge at The Modern Marigold, yay).


I did alter it a bit - I didn't use boning because they didn't have it at Wal-Mart when I did my quick costume supply shopping trip. Instead, I made the wings out of two layers of fabric, one of which was somewhat stiff, and that way the wings supported themselves and boning was unnecessary. Also, to attach the wings to the shirt, I cut out the side seams and resewed them with the wings, so now they're actually "built in" to the shirt. Again, I used a basic turtleneck and sweatpants as the base for the costume.


Ears and makeup, and my little bat was ready to fly.


The Butterfly

For Audrey's butterfly costume, all I had to do was add wings to a black turtleneck and pair it with black pants. And make an antenna headband that she wasn't too fond of wearing.


The wings are just two layers of fabric, with some interfacing to keep them stiff. I used a zigzag stitch to emphasize the shape of the wings. Then I sewed them onto the shirt. If I had it to do again, I would have just glued or pinned them on, because getting the shirt up onto the sewing machine enough to sew the top of the wings was really hard! And I would have used a bent clothes hanger or something to help the wings keep their shape - even with the interfacing they flopped forward too much and didn't really hold their shape well. But still, for a last minute project, it turned out okay.


Fun costumes!

Thursday, October 13, 2011

Three Days of KCWC and pin-did

This past week has been Kids Clothes Week, over at elsie marley! The challenge was to spend one hour every day working on clothes for the kids. I have been cheerfully participating - my kids have really been in need of some new clothes to carry them into the cool fall season. I'm posting the work of three days in one post, because I bought a new camera (imagine a huge choir singing "hallelujah!") but it didn't get here until today (Thursday) so I couldn't take pictures. My old camera has finally finished biting the dust. I couldn't even see any picture I took with it until I uploaded it onto the computer. And forget about adjusting for focus, lighting, etc. Hooray for my new Fuji S1500. :)

Also, every item I've worked on so far this week has been something that I have pinned on Pinterest. So this also counts toward the Pin-Did challenge at The Modern Marigold. This challenge is to once a week actually do something that you have pinned on Pinterest. What a novel idea!

Monday:

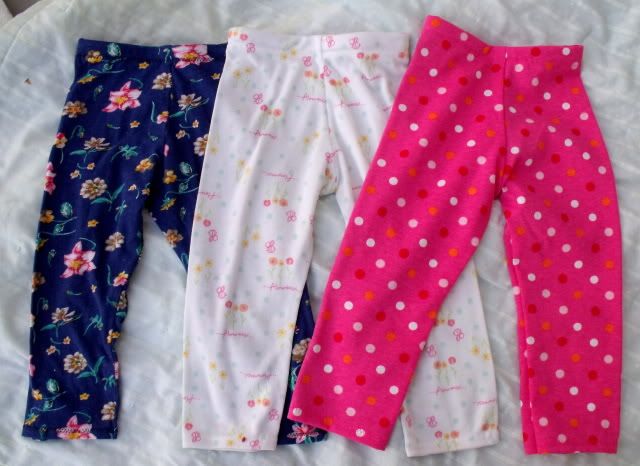
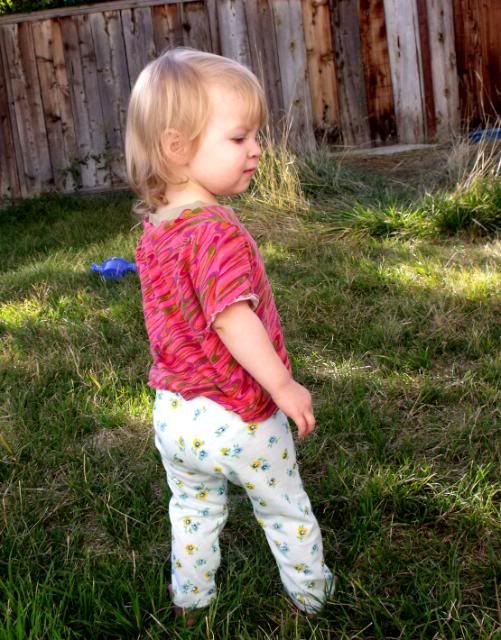
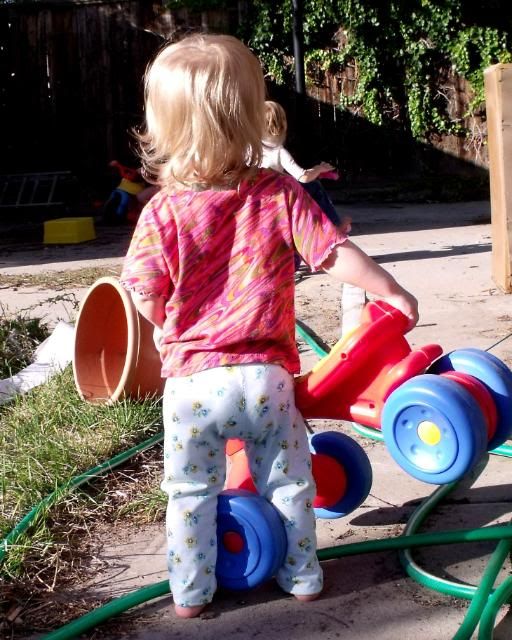
Audrey needed new leggings. She has so many cute little dresses, and with the weather getting cooler (we can see snow on the mountains!) leggings are the perfect thing to keep those cute little legs warm. I used the tutorial from make it & love it (pinned here) to make some super simple leggings. It's such a simple pattern that I was able to make four pairs in part of an evening. Now those little legs will stay warm when Audrey is dressed up for church. Or wherever. :)


Tuesday:

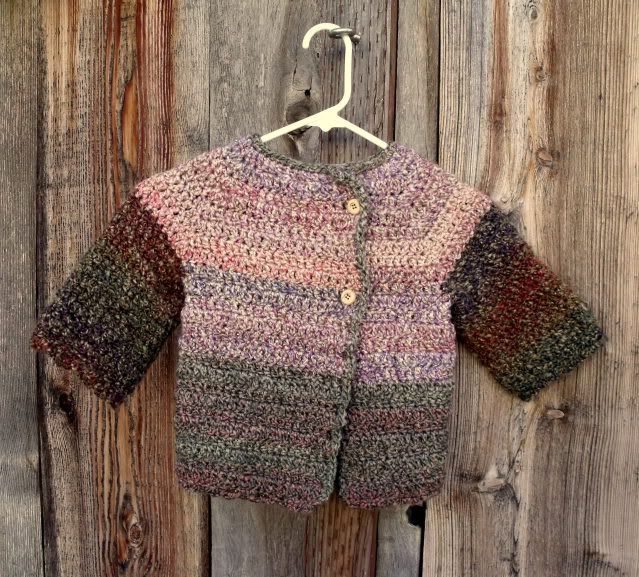
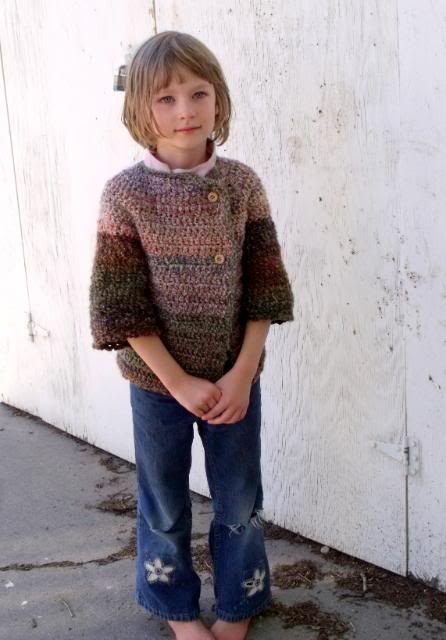
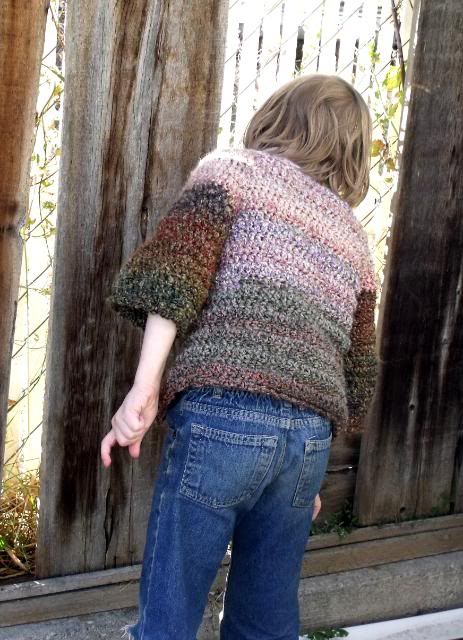
I headed in a different direction on Tuesday - crochet. Using this pattern from Christina's Crochet Haven (pinned 
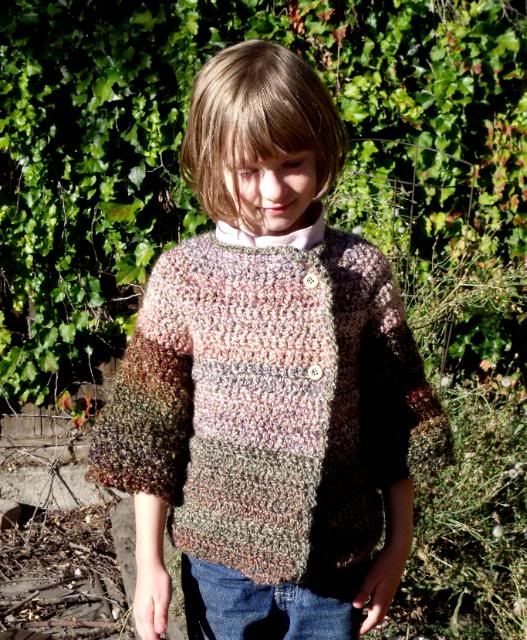
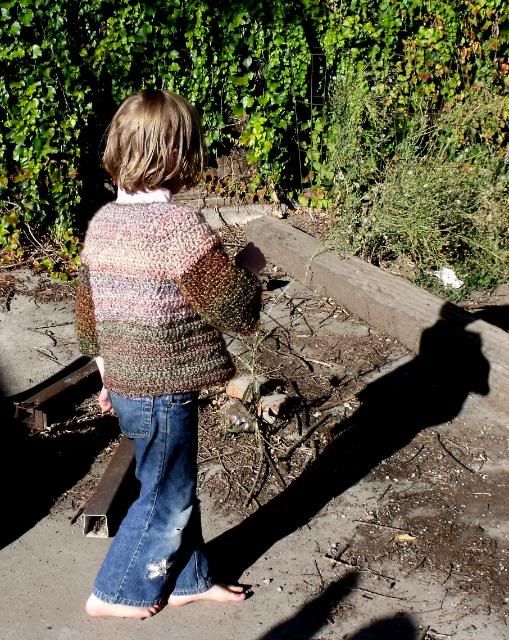
here), I made a darling sweater coat for Zaylee. She loves wearing sweaters, and this one just looked so cute and fun. I didn't have enough of any one colorway to do the whole sweater, so I ended up using three different skeins - one for the top of the bodice, one for the bottom of the bodice, and one for the sleeves. I actually really like the way it turned out. Besides, color blocking is a pretty trendy look right now, so I can probably get away with telling people I did it on purpose.


Just a quick note: I love working with Lion Brand Homespun. It's so soft and chunky, and very comfortable. And the mild color gradations are just so fun and so pretty. Plus the texture is great for hiding little mistakes (nothing too major, just wonky tension and stuff like that). I always keep an eye out for it at thrift stores, because I'm too cheap to buy it retail. But when I do find it, it's like I've found a pirate's treasure, that's how excited I get. I just really like this yarn.

Wednesday:

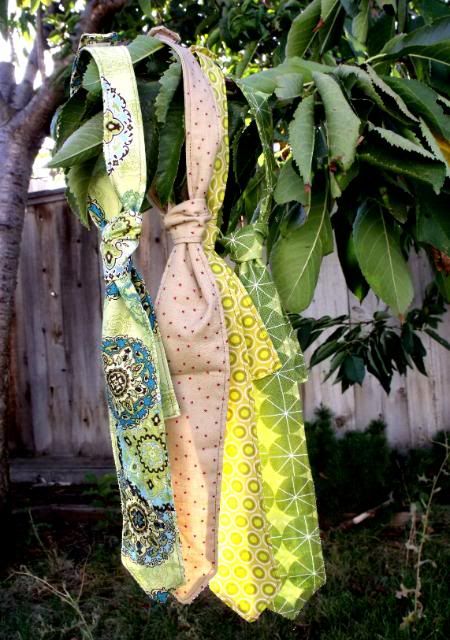
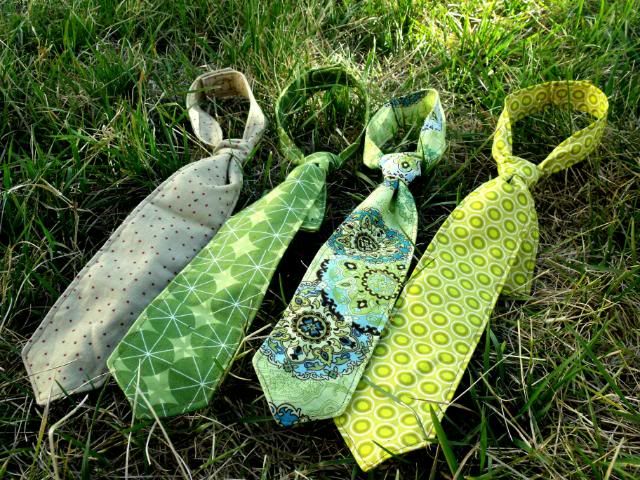
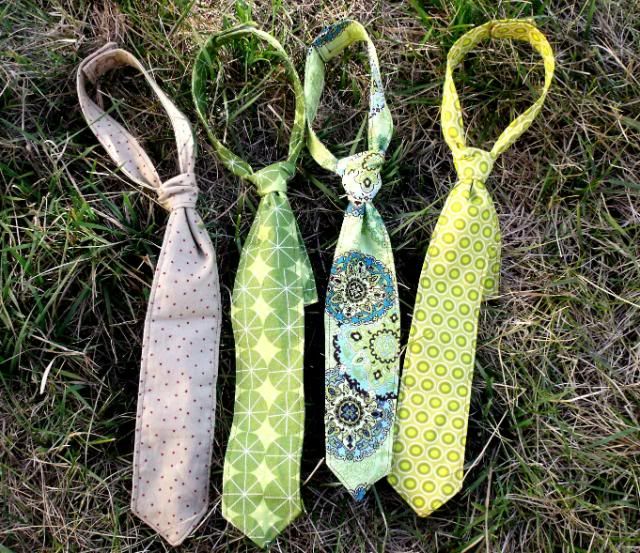
Thomas' turn to get in on the KCWC action. I recently got my little guy a few new dress shirts for church. Naturally this led to the desire to make new ties to go with his new shirts. I loosely followed the tutorial to make a skinny tie from see kate sew (pinned here). I didn't follow the pattern/tutorial exactly, because I wanted the ties to be a little bigger. I went ahead and made several ties, assembly line style, so we can have a variety to choose from each week. I love dressing up my kids, it's so fun.


Also linking to:
Feelin' Feminine Friday at The American Homemaker
friday fun finds at kojodesigns