Anyone who knows us on Facebook and/or real life knows that Jeff and I are remodeling our kitchen this summer. This is a pretty big deal for us - we've lived in this house for almost 4 years and haven't really changed anything in the house since then.
We still haven't painted the hallway after tearing down the wallpaper before we moved in. The dishes and everything in the kitchen are still located where they were haphazardly tossed when we unpacked the boxes - not a lot of make-sense organization going on in there. So to be taking apart the kitchen and putting it all together again with better layout, cabinets, and flooring is a really big deal.
Not to mention the fact that we're doing it all ourselves. No contractors, no workers. We're doing our own flooring, cabinets, counter tops - everything. And I'm so excited about it!
I have been posting little updates on Facebook about the design process and what not, but I decided that it would be neat to create blog post updates as well. I can be a bit more detailed on the blog. So this post is mostly to catch up on what I've accomplished so far, and I'll be sharing more as we continue to work on the kitchen.
I started with the idea to remove the peninsula from the kitchen - it cuts the kitchen/dining space in half and creates a couple awkward areas. First, there's only a small walkway to get from the kitchen to the dining area between the fridge and the peninsula, and if the fridge is open no one can walk through. And second, the dishwasher opens up right in front of the sink, so we have to stand at an uncomfortable angle to rinse and load the dishes.
After dreaming about taking out the peninsula for months, I took it to the next level and started a Pinterest board. Oh yeah, I was really getting serious now! I started pinning articles about how to remodel a kitchen, plans for making kitchen cabinets, tutorials for creating hardwood counter tops, and ideas for appliances, lighting, flooring, and anything else I could think of that I wanted in my new kitchen.
Next came the actual plan. I took lots of measurements and drew out what I would like the new kitchen layout to be. Without the peninsula, it will be more open. The storage and counter space that we're losing with the removal of the peninsula will be replaced by adding some cabinetry to the wall next to the fridge.
We'll save time, effort, and money by keeping the sink and fridge where they are, and the range will only be moving a few inches so that shouldn't be a problem. But the dishwasher will be next to the sink, which makes so much more sense!
After making this general plan, I got more specific as far as cupboards and drawers and such. Here are the plans I created which show where shelves and drawers will go on the range wall, the sink wall, and the fridge wall.
These plans took a lot of brain work - I stayed up super late a couple nights making them, but I loved every minute of it!
Next came the step of creating plans and cut lists for each individual cabinet. I relied heavily on Ana White's plans for basic wall cabinets and base cabinets. As I shared on Facebook, some plans were fairly simple, and some made me want to tear my hair out! The most major plan was the cabinet that sits next to the range, and goes all the way to the corner. The fact that I had drawers and vertical shelves to plan for made the calculations and measurements head-spinningly difficult for me, but eventually I got it figured out.
Seriously, look at that! It's ridiculous how many times I had to scratch my head, erase a whole bunch of numbers, and add everything up over and over again to make it all work to fit in the space properly.
But finally, I had plans drawn up for every single cabinet I'm going to build. Major sense of accomplishment there! I chose one of the simplest plans to start with, and after purchasing some beautiful hardwood maple plywood, I was finally ready to start building.
This first cabinet took me two days to build - one to make the carcass, one to add the back and the face frame. The sense of accomplishment I feel after completing this is indescribable.
After building one cabinet, and knowing that I still have 12 more cabinets of varying size and difficulty yet to build, plus a table comprised of a farmhouse table top and two additional cabinets, plus a storage bench, plus a kitchen island, I can honestly say that this kitchen will be a true labor of love. A WHOLE TON of work, but a whole lot of love.
I'm having to work around nap times, taking care of four kids, Jeff's
odd work schedule, and trying not to be working in the hottest part of
the day. I have to deal with the fact that I am extremely prone to
migraines, and two of my triggers happen to be heat and physical
exertion, so I have to take pain relief before I even go outside to
start working each day. But looking at these kitchen plans, looking at
my Pinterest board, dreaming of what my kitchen will be someday soon, I
know that it will be worth it!
Linking to:
Think Tank Thursday at Joyful Homemaking
Tuesday, June 25, 2013
Tuesday, June 4, 2013
Tea Cup Rain Chain - Iron Craft #11
Our Iron Craft challenge was to create something dealing with rain, clouds, etc. I was intrigued by the idea of rain chains - alternatives to downspouts which "make a water feature out of the transport of rainwater from the guttering downwards to a drain or to a storage container." Wikipedia
I wanted to make a rain chain out of little tea cups, so I headed to the thrift store. It's a great place to shop for craft supplies. Here's some of the pretty little cups I found, only 75 cents each.
Other supplies for this project included some chain (I used white plastic chain), some 14-guage wire to wire the cups onto the chain, and some wire cutters.
Since I needed to drill a hole in the bottom of each cup, I picked up a masonry drill bit. I assumed that since it was strong enough to drill through cement, it would surely be strong enough for porcelain and ceramic. However, after trying to drill a hole for at least 15 minutes, and making little more than a dimple in the surface of the cup, I realized I needed something stronger.
So don't use a masonry bit to drill in tea cups.
Instead, I found a diamond-tip drill bit that is specifically for use on ceramic, porcelain, and glass. I guess I should have believed all those web sites I checked out when they said you had to use the diamond-tip. They know what they're talking about!
This video shows how to drill a hole in the bottom of a ceramic pot, and I used this technique to drill a 1/4-inch hole in the bottom of each tea cup. Some took longer than others. It depended on the thickness of the cup, as well as the strength of the porcelain or ceramic.
Then I cut the chain into segments of about 10 inches each. Similar to this video, I attached the cups to the sections of chain, only I used the 14-guage wire instead of fishing line.
And here is my finished rain chain! I love how it turned out, so dainty and pretty.
Due to some problems with our gutter, I haven't actually installed the rain chain yet. I took these pictures with the chain just hanging off a loose gutter nail. Once we get the gutters fixed, the chain will hang where the downspout currently is.
I want the water to drain into a large container, so that we can collect the rain water and use it to water our vegetable garden. So I bought this large planter, which I'll place directly under the rain chain as soon as we get it properly hung.
There were five of these lovely cups at the thrift store. I was thrilled. Unfortunately, they took the longest to drill through, so by the time I was done, I was quite a bit less thrilled with these cups! But now that I'm done, I can love them again.
Linked to:
Think Tank Thursday at Joyful Homemaking
Project Inspire{d} at Dukes and Duchesses
I wanted to make a rain chain out of little tea cups, so I headed to the thrift store. It's a great place to shop for craft supplies. Here's some of the pretty little cups I found, only 75 cents each.
Other supplies for this project included some chain (I used white plastic chain), some 14-guage wire to wire the cups onto the chain, and some wire cutters.
Since I needed to drill a hole in the bottom of each cup, I picked up a masonry drill bit. I assumed that since it was strong enough to drill through cement, it would surely be strong enough for porcelain and ceramic. However, after trying to drill a hole for at least 15 minutes, and making little more than a dimple in the surface of the cup, I realized I needed something stronger.
So don't use a masonry bit to drill in tea cups.
Instead, I found a diamond-tip drill bit that is specifically for use on ceramic, porcelain, and glass. I guess I should have believed all those web sites I checked out when they said you had to use the diamond-tip. They know what they're talking about!
This video shows how to drill a hole in the bottom of a ceramic pot, and I used this technique to drill a 1/4-inch hole in the bottom of each tea cup. Some took longer than others. It depended on the thickness of the cup, as well as the strength of the porcelain or ceramic.
Then I cut the chain into segments of about 10 inches each. Similar to this video, I attached the cups to the sections of chain, only I used the 14-guage wire instead of fishing line.
And here is my finished rain chain! I love how it turned out, so dainty and pretty.
Due to some problems with our gutter, I haven't actually installed the rain chain yet. I took these pictures with the chain just hanging off a loose gutter nail. Once we get the gutters fixed, the chain will hang where the downspout currently is.
I want the water to drain into a large container, so that we can collect the rain water and use it to water our vegetable garden. So I bought this large planter, which I'll place directly under the rain chain as soon as we get it properly hung.
There were five of these lovely cups at the thrift store. I was thrilled. Unfortunately, they took the longest to drill through, so by the time I was done, I was quite a bit less thrilled with these cups! But now that I'm done, I can love them again.
And thus concludes this installment of the tale of the dainty rain chain. I will post about it again once it is properly installed. :)
Think Tank Thursday at Joyful Homemaking
Project Inspire{d} at Dukes and Duchesses
Monday, May 20, 2013
Awesome Finds
This past Saturday, our church had a give-away-a-bunch-of-stuff-for-free thing. I love getting anything for free, and was excited to go. I didn't really expect to find much beyond some clothes for myself and the kids, and maybe the husband. That was exciting enough for me. But I ended up coming home with much more.
Get ready, there are lots of pictures in this post!
The first thing I saw upon entering the gymnasium, aside from the all the folding tables covered with clothes, was this vintage Singer sewing machine! I absolutely love vintage, and old-timey sewing machines make me giddy. And this one was sitting there just waiting for me to take it home and call it my own. And it was free! And now it is mine and I love it.
Get ready, there are lots of pictures in this post!
The first thing I saw upon entering the gymnasium, aside from the all the folding tables covered with clothes, was this vintage Singer sewing machine! I absolutely love vintage, and old-timey sewing machines make me giddy. And this one was sitting there just waiting for me to take it home and call it my own. And it was free! And now it is mine and I love it.
| Not only is it beautiful, but it is also in perfect working order. Score! |
| Oh, sewing machine attachments? Don't mind if I do! |
| Wait - what the? |
| Okay, I recognize some of these (button hole attachment), but those larger ones look more like tiny instruments of medieval torture than sewing machine attachments! LOL! Whatever, I'm still thrilled. |
Upon further inspection, I realized that the whole table upon which the sewing machine had sat was covered with a variety of other sewing supplies and notions, most of them also vintage. So I continued to help myself. Here's everything I found:
Let's take a closer look!
| Thread! So much thread! And most of the spools are wooden, which I love. |
| Tape measures! |
| A snap kit! |
| Sewing kits! Including two from the Hilton. |
| Needles! I don't think I've ever been in possession of so many sharps in my life. |
| Machine needles. Including a double needle, several ball points, and a few all-purpose. |
| More sharps - pins! I especially love the Patricia box. Seriously so cute. |
| Fasteners - snaps and hook & eye |
| A small but heavy-duty pair of perfectly patina-ed pinking shears |
| A variety of elastic |
| Five seam rippers. I'll never have to worry about sewing mistakes again. |
| Finally, a few random things - thimbles, stitch gauges, a thread cylinder, and a tiny embroidery hoop. |
And thus ends my round up of all the lovelies that I got - for free!! - on Saturday. Happy day! :)
Tuesday, March 26, 2013
Iron Craft #6 - Peeps Mantle Decor
This Iron Craft challenge was fun - create something with marshmallow Peeps, or use them for inspiration. I stuck with something simple, since I'm still recovering from my gallbladder surgery. My mantle needed some brightening up, so I used the neon colors of the Peeps to add springtime brightness and fun.
The glass containers were ones I already had lying around. I used candy-coated chocolate eggs in the bottom, topped with Peeps, and then some flowers from the craft section at Wal-Mart. Easy peasy!
I finished the mantle by spelling Happy Easter with my letter blocks, hanging a Peeps banner I made a year or two ago, and displaying a picture of Christ at the tomb (a reminder of why we celebrate Easter).
Linking to:
Think Tank Thursday at Joyful Homemaking
Weekend Wrap Up Party at tatertots and jello
The glass containers were ones I already had lying around. I used candy-coated chocolate eggs in the bottom, topped with Peeps, and then some flowers from the craft section at Wal-Mart. Easy peasy!
I finished the mantle by spelling Happy Easter with my letter blocks, hanging a Peeps banner I made a year or two ago, and displaying a picture of Christ at the tomb (a reminder of why we celebrate Easter).
Linking to:
Think Tank Thursday at Joyful Homemaking
Weekend Wrap Up Party at tatertots and jello
Tuesday, March 12, 2013
Iron Craft #5 - Green Binky Clip
This is so far my smallest Iron Craft creation, but I have a really good excuse. I've been dealing with some really painful gallbladder issues, and finally had to have my gallbladder taken out. Actually, I'm writing this post a few days before the surgery, but since my surgery is scheduled for the day before Reveal Day, I'm just writing this ahead of time, and that ornery little organ will be out and gone by the time this post is up.
Our challenge this round is Green - either the color green, or the environmentally-friendly "green." I've been meaning to make my little guy a binky clip for quite a while, so I made him a green one.
As a fourth time mom, I'm not really all that concerned about germs on the pacifier, a little dirt never hurt anyone. However, it was really frustrating when he would drop the binky because it would roll unpredictably all over the place and disappear. Those things are sneaky! I could never keep track of his many pacifiers because they were always getting lost. Not anymore!
I followed this tutorial from see kate sew to make this pacifier clip.
Linking to Tatertots and Jello Weekend Wrap-Up Party
Our challenge this round is Green - either the color green, or the environmentally-friendly "green." I've been meaning to make my little guy a binky clip for quite a while, so I made him a green one.
As a fourth time mom, I'm not really all that concerned about germs on the pacifier, a little dirt never hurt anyone. However, it was really frustrating when he would drop the binky because it would roll unpredictably all over the place and disappear. Those things are sneaky! I could never keep track of his many pacifiers because they were always getting lost. Not anymore!
I followed this tutorial from see kate sew to make this pacifier clip.
Linking to Tatertots and Jello Weekend Wrap-Up Party
Tuesday, February 26, 2013
Iron Craft #4 - Mockingjay Tote Bag
In honor of entertainment's award season, this Iron Craft challenge was to make something inspired by TV or movies, or something that could be worn on the red carpet.
I had a really tough time trying to figure out what to do for this challenge. I just wasn't feeling inspired by any ideas I had. Finally, I was browsing Pinterest and came across a pattern for crocheting or knitting a Mockingjay Pin, worn by Katniss Everdeen in The Hunger Games. A light bulb went off. I love The Hunger Games! I've got the books on my kindle and have read them at least 4 or 5 times. So I grabbed some yarn and got to work.
I know this makes 3 out of 4 challenges that I've crocheted. I do have other crafting skill sets, promise! It's just that my sewing machine and other craft paraphernalia happen to be in the baby's room, so it's not available to me during my favorite crafting time (late at night), because the baby's asleep. I've been meaning to move all my craft and sewing stuff to my room, but I just haven't gotten around to it yet. I think I'll commit to getting that done in time for the next challenge. Hold me to it!
Anywhooooo ... This page contains a link to the chart I used to make the mockingjay.
*Update* Unfortunately, the chart pattern seems to have been removed from the website. I haven't been able to find another chart like this one. If I do, I'll post it here.
As I crocheted, while it was exciting to see the pattern slowly emerge and become recognizable, I wasn't really sure what I was going to do with this square I was making. Eventually I settled on turning it into a simple tote bag. So I made another square for the back, sewed them together, and added handles.
I've crocheted tote bags before, and while I like the way they look, I don't like the way the crochet fabric stretches out of shape when you use the bag. So I put a sewn lining into my bag (here's how). Now it can handle actually toting stuff around, and won't pull out of shape.
Hmm, now I'm craving bread, goat cheese, and lamb stew with dried plums...
Linked to Tatertots and Jello Weekend Wrap-Up Party
Tuesday, February 12, 2013
Iron Craft #3 - Rows of Blossoms Scarf
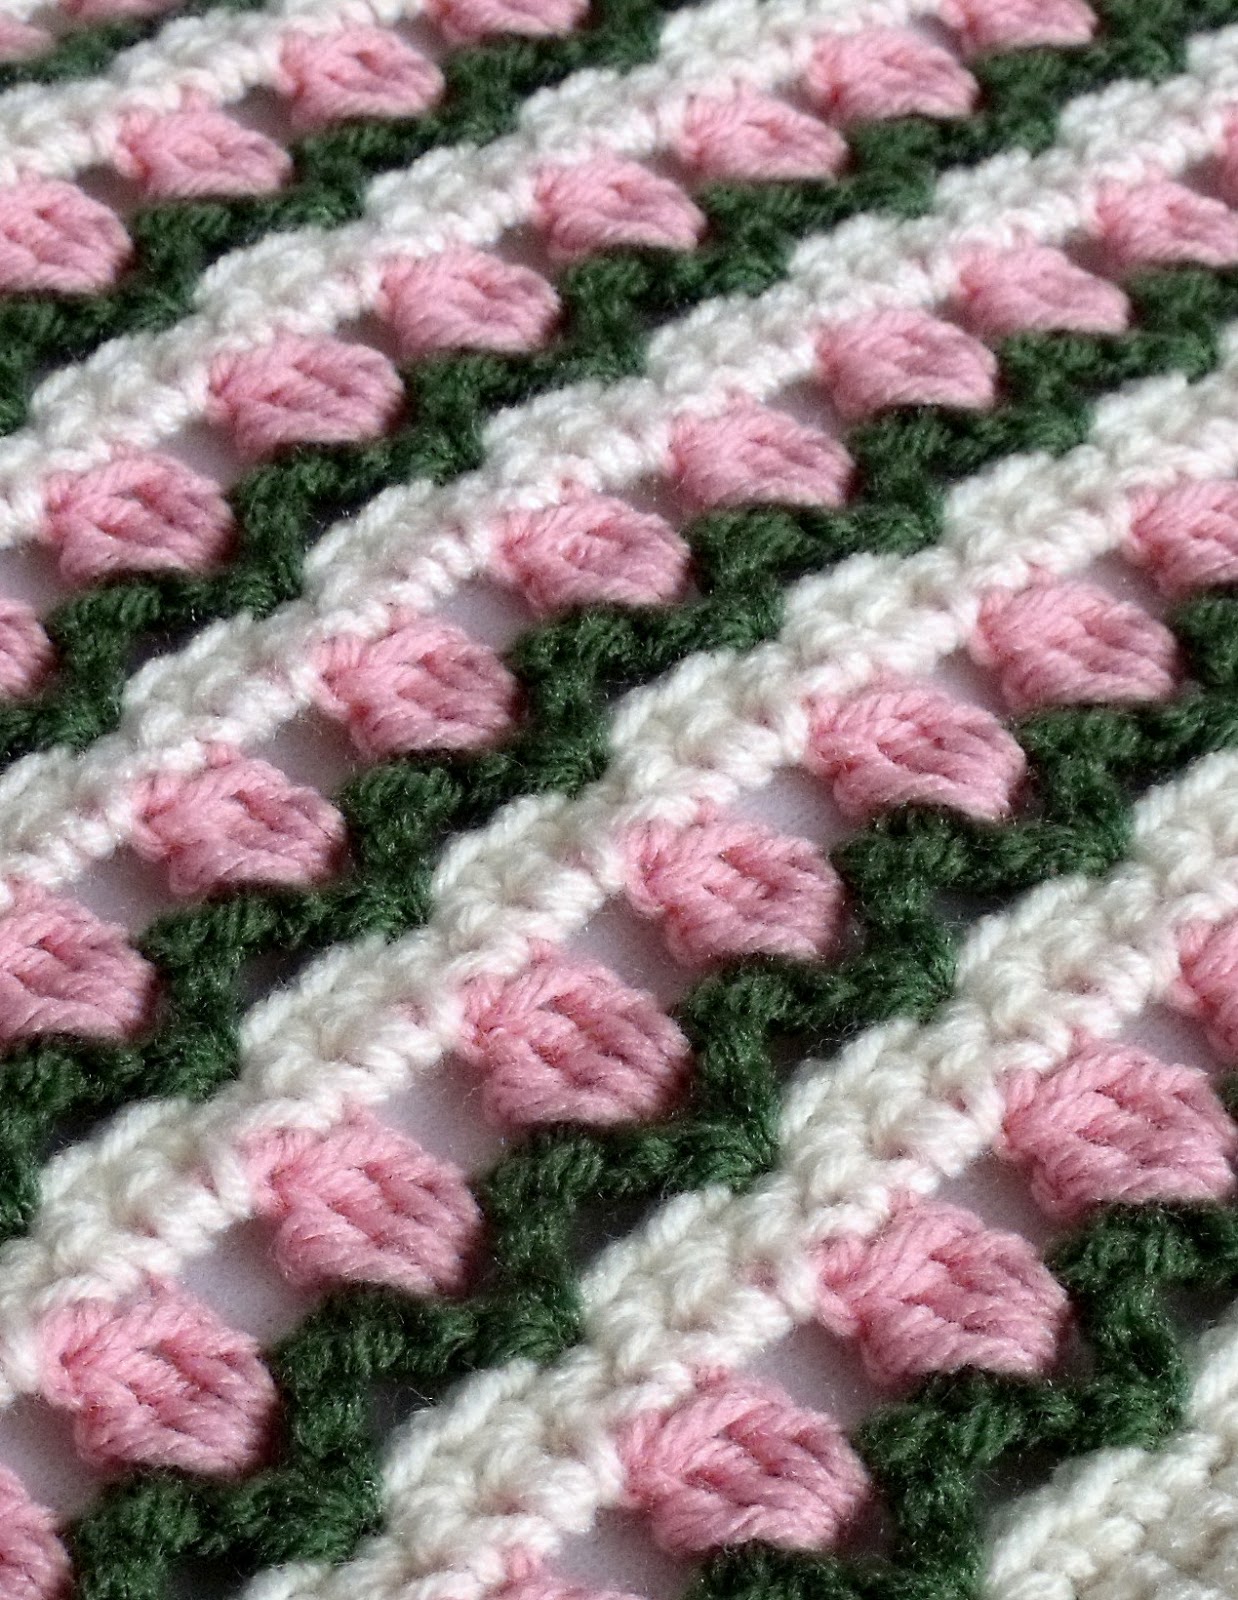
In honor of Valentine's Day, this Iron Craft challenge is Flowers and Hearts. The craft must feature either flowers or hearts (or both if desired), though it doesn't have to be Valentine's themed. I threw around a couple ideas in my head (fabric collage, friendship bracelets, flower-covered tote bag), but when I found this crochet pattern, I knew this is what I wanted to do.
This is my lovely Rows of Blossoms Scarf. I love how the colors look together, very feminine and romantic. I used a pattern for an afghan, just made it smaller. I also put only two rows of stitches between the blossoms instead of four.
I like how the rows look like simple textured stripes from a distance, but when you look closer you can see the pretty little flowers.
I can wear this as a scarf around my neck, or a wrap over my shoulders, or even wrapped all around my head and face for when it's really cold outside. Which, in Utah in winter, is pretty often.
Linking to Tatertots and Jello Weekend Wrap Up Party
This is my lovely Rows of Blossoms Scarf. I love how the colors look together, very feminine and romantic. I used a pattern for an afghan, just made it smaller. I also put only two rows of stitches between the blossoms instead of four.
I like how the rows look like simple textured stripes from a distance, but when you look closer you can see the pretty little flowers.
I can wear this as a scarf around my neck, or a wrap over my shoulders, or even wrapped all around my head and face for when it's really cold outside. Which, in Utah in winter, is pretty often.
Yep. I like my new scarf. :)
Linking to Tatertots and Jello Weekend Wrap Up Party
Subscribe to:
Posts (Atom)