This is so far my smallest Iron Craft creation, but I have a really good excuse. I've been dealing with some really painful gallbladder issues, and finally had to have my gallbladder taken out. Actually, I'm writing this post a few days before the surgery, but since my surgery is scheduled for the day before Reveal Day, I'm just writing this ahead of time, and that ornery little organ will be out and gone by the time this post is up.
Our challenge this round is Green - either the color green, or the environmentally-friendly "green." I've been meaning to make my little guy a binky clip for quite a while, so I made him a green one.
As a fourth time mom, I'm not really all that concerned about germs on the pacifier, a little dirt never hurt anyone. However, it was really frustrating when he would drop the binky because it would roll unpredictably all over the place and disappear. Those things are sneaky! I could never keep track of his many pacifiers because they were always getting lost. Not anymore!
I followed this tutorial from see kate sew to make this pacifier clip.
Linking to Tatertots and Jello Weekend Wrap-Up Party
Tuesday, March 12, 2013
Tuesday, February 26, 2013
Iron Craft #4 - Mockingjay Tote Bag
In honor of entertainment's award season, this Iron Craft challenge was to make something inspired by TV or movies, or something that could be worn on the red carpet.
I had a really tough time trying to figure out what to do for this challenge. I just wasn't feeling inspired by any ideas I had. Finally, I was browsing Pinterest and came across a pattern for crocheting or knitting a Mockingjay Pin, worn by Katniss Everdeen in The Hunger Games. A light bulb went off. I love The Hunger Games! I've got the books on my kindle and have read them at least 4 or 5 times. So I grabbed some yarn and got to work.
I know this makes 3 out of 4 challenges that I've crocheted. I do have other crafting skill sets, promise! It's just that my sewing machine and other craft paraphernalia happen to be in the baby's room, so it's not available to me during my favorite crafting time (late at night), because the baby's asleep. I've been meaning to move all my craft and sewing stuff to my room, but I just haven't gotten around to it yet. I think I'll commit to getting that done in time for the next challenge. Hold me to it!
Anywhooooo ... This page contains a link to the chart I used to make the mockingjay.
*Update* Unfortunately, the chart pattern seems to have been removed from the website. I haven't been able to find another chart like this one. If I do, I'll post it here.
As I crocheted, while it was exciting to see the pattern slowly emerge and become recognizable, I wasn't really sure what I was going to do with this square I was making. Eventually I settled on turning it into a simple tote bag. So I made another square for the back, sewed them together, and added handles.
I've crocheted tote bags before, and while I like the way they look, I don't like the way the crochet fabric stretches out of shape when you use the bag. So I put a sewn lining into my bag (here's how). Now it can handle actually toting stuff around, and won't pull out of shape.
Hmm, now I'm craving bread, goat cheese, and lamb stew with dried plums...
Linked to Tatertots and Jello Weekend Wrap-Up Party
Tuesday, February 12, 2013
Iron Craft #3 - Rows of Blossoms Scarf
In honor of Valentine's Day, this Iron Craft challenge is Flowers and Hearts. The craft must feature either flowers or hearts (or both if desired), though it doesn't have to be Valentine's themed. I threw around a couple ideas in my head (fabric collage, friendship bracelets, flower-covered tote bag), but when I found this crochet pattern, I knew this is what I wanted to do.
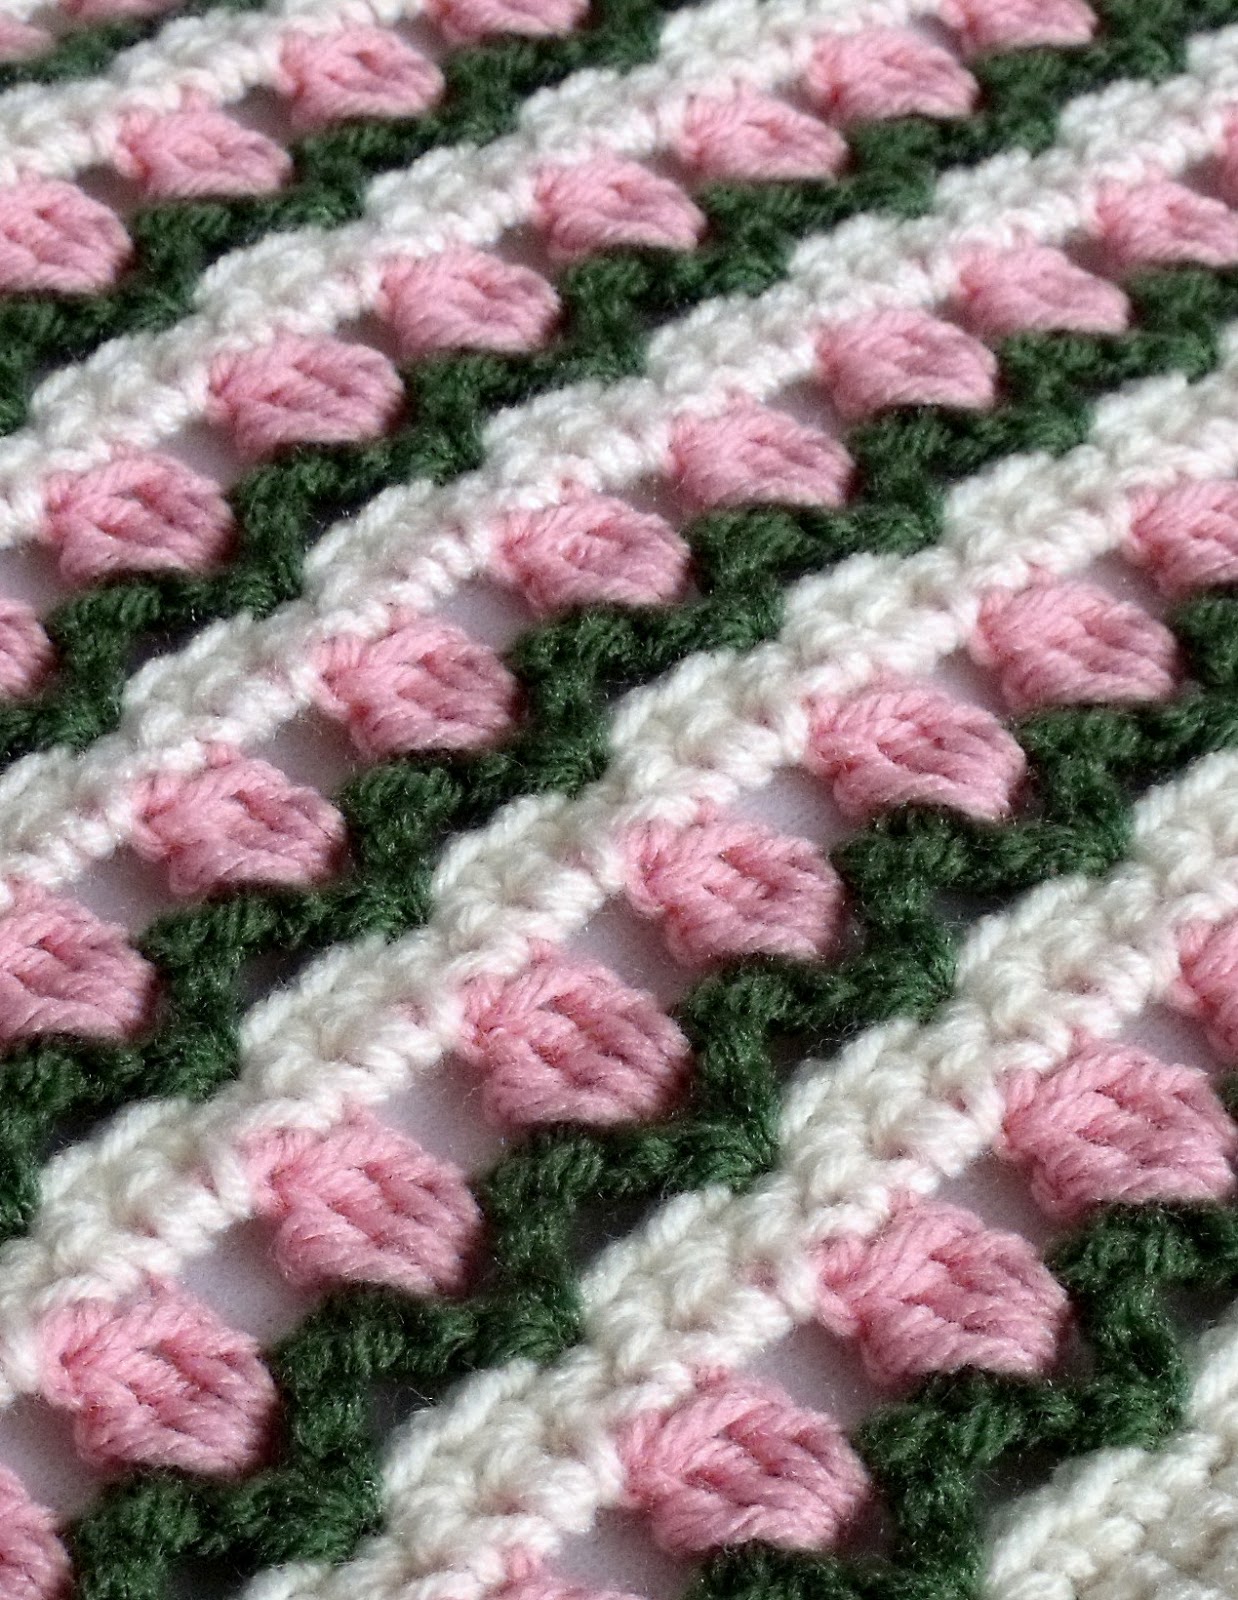
This is my lovely Rows of Blossoms Scarf. I love how the colors look together, very feminine and romantic. I used a pattern for an afghan, just made it smaller. I also put only two rows of stitches between the blossoms instead of four.
I like how the rows look like simple textured stripes from a distance, but when you look closer you can see the pretty little flowers.
I can wear this as a scarf around my neck, or a wrap over my shoulders, or even wrapped all around my head and face for when it's really cold outside. Which, in Utah in winter, is pretty often.
Linking to Tatertots and Jello Weekend Wrap Up Party
This is my lovely Rows of Blossoms Scarf. I love how the colors look together, very feminine and romantic. I used a pattern for an afghan, just made it smaller. I also put only two rows of stitches between the blossoms instead of four.
I like how the rows look like simple textured stripes from a distance, but when you look closer you can see the pretty little flowers.
I can wear this as a scarf around my neck, or a wrap over my shoulders, or even wrapped all around my head and face for when it's really cold outside. Which, in Utah in winter, is pretty often.
Yep. I like my new scarf. :)
Linking to Tatertots and Jello Weekend Wrap Up Party
Wednesday, January 30, 2013
Kokeshi pincushion
I lived in Japan for several years as a teenager. One of my favorite aspects of the culture is the cute little dolls and other trinkets that they make. Hachinohe horses, scroll dolls, washi boxes, and especially kokeshi dolls - I just love them! So my newest pincushion is a sweet crocheted kokeshi doll. Isn't she adorable?
I used this pattern from Ravelry, with a few changes. I added a few rows to the body, and didn't add sleeves. Also I made a little obi tie for the back.
Seed beads for the eyes, and some straight pins in the hair complete the doll. She's glued onto a simple empty thread spool. Eventually I might paint the spool a different color, but for now I like it just as it is.
Little Kokeshi is a bit dwarfed by Miss Dress Form. Eventually I want to have a whole row of pincushions of different heights, colors, and styles, all lined next to my sewing machine. And yes, they will probably all have names. Won't that be fun?
Linking to Tatertots and Jello Weekend Wrap Up Party
I used this pattern from Ravelry, with a few changes. I added a few rows to the body, and didn't add sleeves. Also I made a little obi tie for the back.
Seed beads for the eyes, and some straight pins in the hair complete the doll. She's glued onto a simple empty thread spool. Eventually I might paint the spool a different color, but for now I like it just as it is.
Little Kokeshi is a bit dwarfed by Miss Dress Form. Eventually I want to have a whole row of pincushions of different heights, colors, and styles, all lined next to my sewing machine. And yes, they will probably all have names. Won't that be fun?
Linking to Tatertots and Jello Weekend Wrap Up Party
Monday, January 28, 2013
Iron Craft - Orange
The second Iron Craft Challenge of 2013 is Orange. This could be something that is the color orange, or something made with oranges. Not my favorite color, but as was pointed out on the challenge post, this is supposed to be a challenge. So I embraced it and dug through my fabric stash to find something orange.
I have had my eye on these dress form mannequin pin cushions from The DIY Dish for quite some time. I love dress forms, and I love pin cushions. I think that combining the two is just an adorable stroke of genius.
The butterfly fabric is a fat quarter I got from Wal-Mart a while back. My fabric stash is fairly limited when it comes to orange, so I'm glad I was able to find something this cute. I do wish that I had cut it so that the big butterfly in the front would be right side up, something I'll keep in mind if I make any more of these (and I probably will because it's so easy, cute, and fun).
The candlestick came from the thrift store. While I was there, I picked up a variety of different stand possibilities. I ended up choosing this glass candlestick because I thought it matched the big bead at the top of the dress form.
Now that I've made this adorable pincushion, I find myself suddenly obsessed with pincushions! I have a couple already, a plain tomato and a patchwork square. But now I want to make more and more, because I think little Miss Dress Form looks lonely. She needs some friends. Like these! Or these! And one of these would be fun too. :)
Linking to Tatertots and Jello Weekend Wrap Up Party
I have had my eye on these dress form mannequin pin cushions from The DIY Dish for quite some time. I love dress forms, and I love pin cushions. I think that combining the two is just an adorable stroke of genius.
The butterfly fabric is a fat quarter I got from Wal-Mart a while back. My fabric stash is fairly limited when it comes to orange, so I'm glad I was able to find something this cute. I do wish that I had cut it so that the big butterfly in the front would be right side up, something I'll keep in mind if I make any more of these (and I probably will because it's so easy, cute, and fun).
The candlestick came from the thrift store. While I was there, I picked up a variety of different stand possibilities. I ended up choosing this glass candlestick because I thought it matched the big bead at the top of the dress form.
The flower is a small strip of rolled felt, with a pretty button from my stash.
Now that I've made this adorable pincushion, I find myself suddenly obsessed with pincushions! I have a couple already, a plain tomato and a patchwork square. But now I want to make more and more, because I think little Miss Dress Form looks lonely. She needs some friends. Like these! Or these! And one of these would be fun too. :)
Linking to Tatertots and Jello Weekend Wrap Up Party
Tuesday, January 15, 2013
Iron Craft Challenge - Cotton
Well, I'm working on jumping back into the saddle and posting on my blog again! I have joined Iron Craft at justcraftyenough, where a new crafting challenge is posted every two weeks. 2013's inaugural challenge theme is Cotton. So many possibilities, and I'm excited to see what my fellow Iron Crafters have come up with!
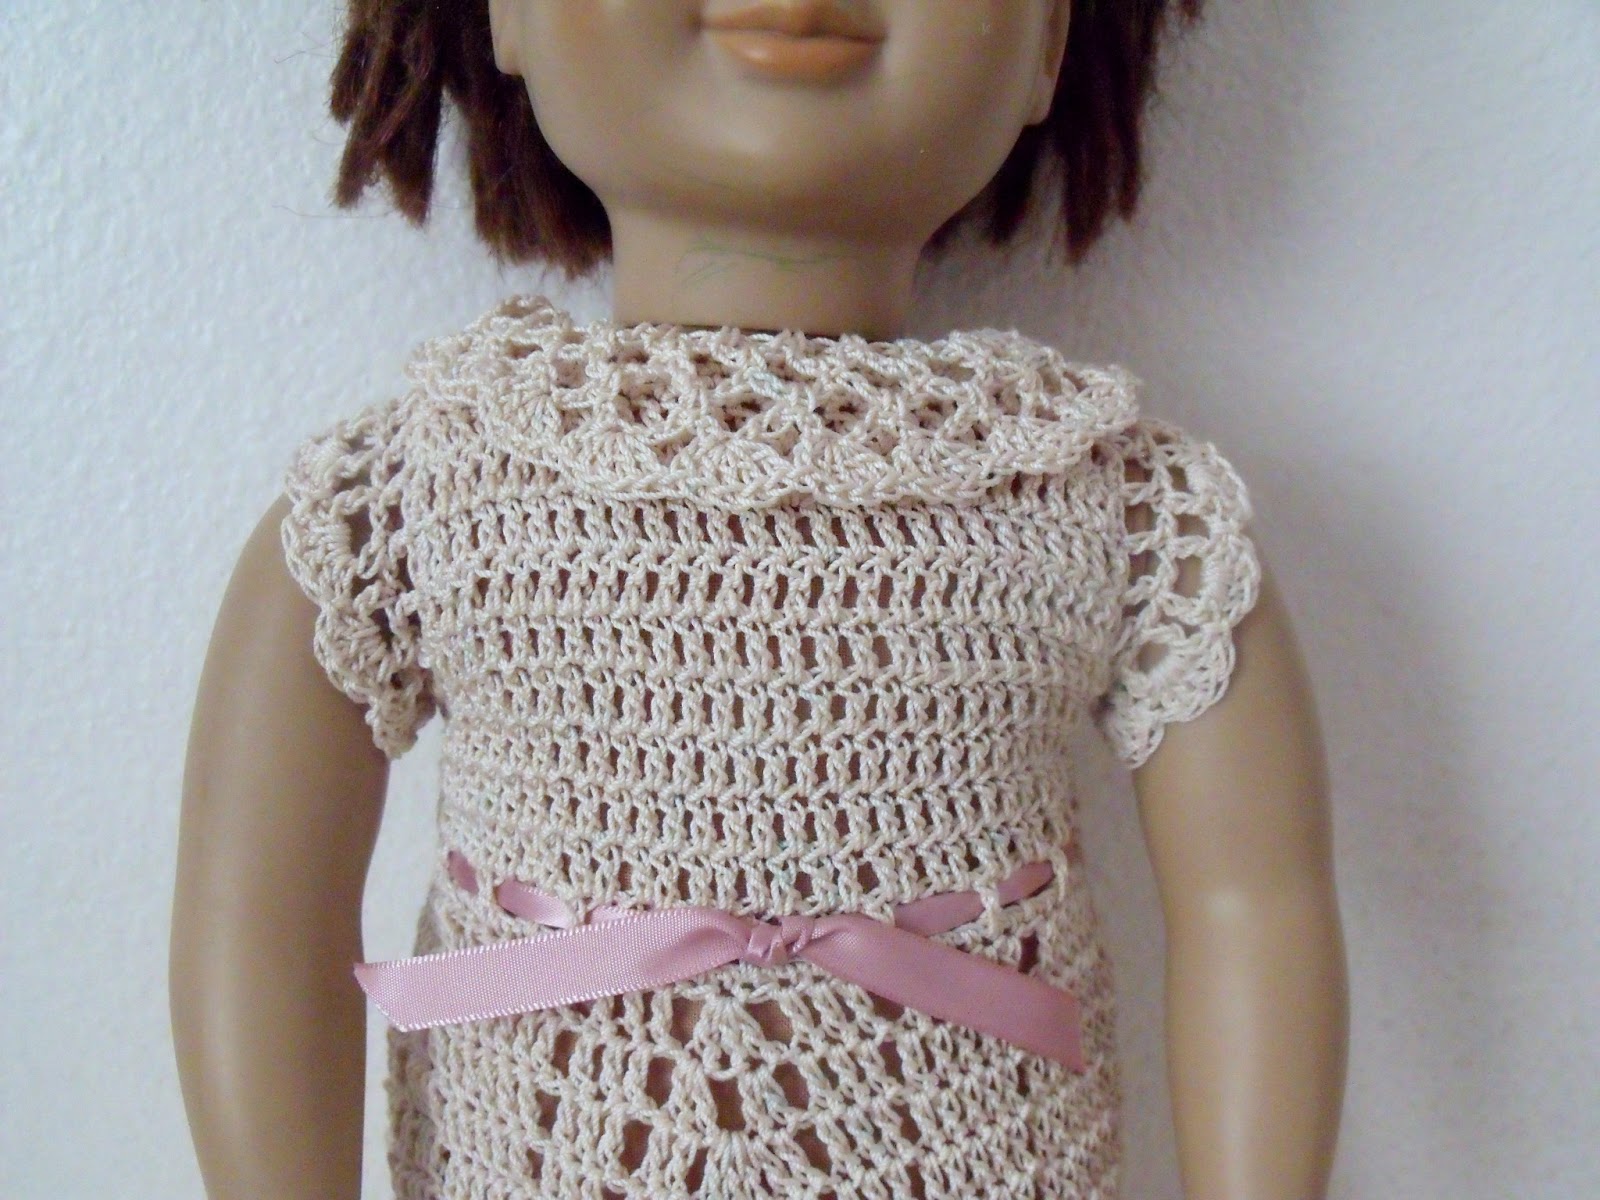
I eventually decided to take the crochet route. I crocheted this lacy little dress for my daughter's 18-inch doll.
It's kind of funny, I think I'm more interested in dressing this doll than my daughter is. She's more interested in bugs, spooky things, science, nature collections, and stuff like that. I say more power to her - I loved science stuff when I was younger too, and still do. But maybe someday she'll decide that playing dress-up with dolls is fun too.
So here I am, slowly adding pretty things to the limited wardrobe of this poor, unappreciated little doll. I should have cleaned her up a bit for the pictures - her hair is a mess and her face is covered in crayon. Makes me glad I never went out and spent big bucks on an authentic American Girls doll - this one is a cheaper version and it was a hand-me-down from a friend besides. :)
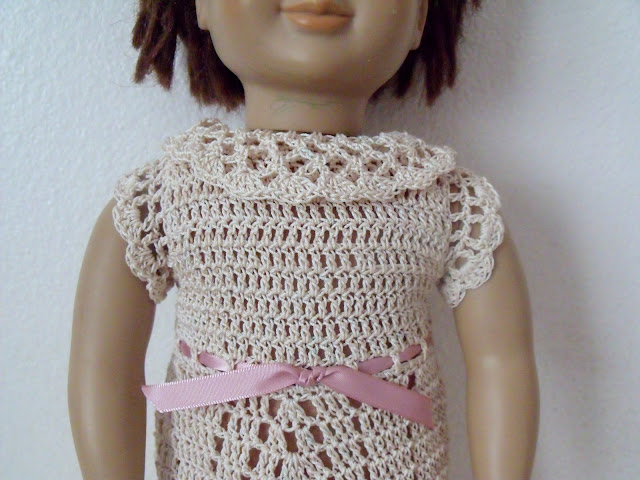
The dress is made from size 10 cotton thread. The dress pattern is found here. I found the pattern a bit difficult to read, the instructions aren't very clear in some places. That's okay, I wanted something that would challenge myself a bit. My dress ended up a little different than the original, especially in the back. But it's still a very sweet little dress.
Linking to Tatertots and Jello Weekend Wrap-Up Party
I eventually decided to take the crochet route. I crocheted this lacy little dress for my daughter's 18-inch doll.
It's kind of funny, I think I'm more interested in dressing this doll than my daughter is. She's more interested in bugs, spooky things, science, nature collections, and stuff like that. I say more power to her - I loved science stuff when I was younger too, and still do. But maybe someday she'll decide that playing dress-up with dolls is fun too.
So here I am, slowly adding pretty things to the limited wardrobe of this poor, unappreciated little doll. I should have cleaned her up a bit for the pictures - her hair is a mess and her face is covered in crayon. Makes me glad I never went out and spent big bucks on an authentic American Girls doll - this one is a cheaper version and it was a hand-me-down from a friend besides. :)
| Close-up of front |
| Close-up of back |
The dress is made from size 10 cotton thread. The dress pattern is found here. I found the pattern a bit difficult to read, the instructions aren't very clear in some places. That's okay, I wanted something that would challenge myself a bit. My dress ended up a little different than the original, especially in the back. But it's still a very sweet little dress.
Linking to Tatertots and Jello Weekend Wrap-Up Party
Friday, May 11, 2012
Scripture Covers
Our Primary presidency has been encouraging all the kids to bring their scriptures to Primary each week. I've kind of been a slacker, and my kids didn't even have any scriptures. But I went to the thrift store today and got Zaylee and Thomas each a hardcover Book of Mormon that they can bring to church.
And of course, I can't get them each a Book of Mormon without making each of them a scripture cover to go with it!
I used this tutorial from delia creates. It was very easy to follow and the cases both turned out really cute. I think I like Zaylee's a little bit more, just because the fabric is so colorful and fun. Anyway, the kids are really excited to have their own scriptures and to have such fun scripture covers to carry them around in.
Linking to tatertots & jello Weekend Wrap Up Party
And of course, I can't get them each a Book of Mormon without making each of them a scripture cover to go with it!
I used this tutorial from delia creates. It was very easy to follow and the cases both turned out really cute. I think I like Zaylee's a little bit more, just because the fabric is so colorful and fun. Anyway, the kids are really excited to have their own scriptures and to have such fun scripture covers to carry them around in.
| Of course, coming from the thrift store, the books have been written in. The kids don't mind though, I don't think they even noticed. |
Linking to tatertots & jello Weekend Wrap Up Party
Subscribe to:
Posts (Atom)